Raspberry Pi 3 Hardware Flow Control
Background
Getting the UART (serial port) going on a Raspberry Pi is generally
fairly straightforward as long as you use a device that can handle
converting the 3.3V TTL outputs to proper serial levels (or else just
use a USB serial adapter that handles this).
By using the RX/TX/GND pins on the GPIO header you can get a standard
serial port with software flow control (meaning you can use ^S and ^Q
to stop and start the flow of characters).
Serial ports traditionally also supported various types of hardware flow
control, where extra wires are used to start and stop the flow (especially
useful if your program [e.g. EMACS] wants to use every possible control
character). The Raspberry Pi machines support hardware flow control
but it can be tricky to set up.
I started looking into this due to JWZ's troubles getting his
old AAA60 terminal working with a Pi 3
(link1,
link2).
Since I teach a course where we do low level work on the Pi serial
port and write low-level UART drivers I thought
I could maybe help out and perhaps accomplish the impossible task of giving
a useful reply to a lazy-web request. As with all embedded system/Linux
tasks it turned out to be impossibly complex, especially when trying
to diagnose locally.
How to
- First get serial working with software flow control on your pi.
I won't go into too many details on this, as by default if
you're running Raspbian it's usually set up and working.
For testing you can install apt-get minicom to
give your serial port experience the old 1980s BBS feel
that you've been missing.
- Note that if you have a Pi3, the "good" serial port (ttyAMA0)
driven by drivers/tty/serial/amba-pl011.c
has been taken away and given to the bluetooth interface,
leaving only the simpler/more-troublesome "mini-uart" instead.
You will probably want to switch it back. You can do
this by editing /boot/config.txt and adding the
line dtoverlay=pi3-miniuart-bt
- The hardware flow control pins RTS/CTS are not enabled by default.
You will need a program that enables them. On older Pis
the pins are on a non-soldered header and you will have to
do some extra work to get access to them. On the newer boards
with 40-pin headers (b+, 2b, 3b) the pins are available.
To enable RTS/CTS you will need to run a program that toggles
the proper GPIO output multiplexing bits to switch them to
be RTS/CTS. On Pi3 this means GPIO16 (header pin 36) becomes
CTS and GPIO17 (header pin 11) becomes RTS.
There are various tools floating around that do this for you,
but most don't handle the Pi3 properly (the Pi2 and Pi3
have more RAM so the MMIO offset is at a different location
than on earlier boards). I have some code that will do this
in my github repository:
https://github.org/deater/uarch-configure/rasp-pi-serial
Run rpirtscts on.
- Once you have RTS/CTS enabled, in theory the Linux kernel driver
will automatically use it. You can use the pulse_rts
and toggle_rts programs in the aforementioned repository
to test this, either with a multimeter or by putting a resistor
and LED on the proper pin.
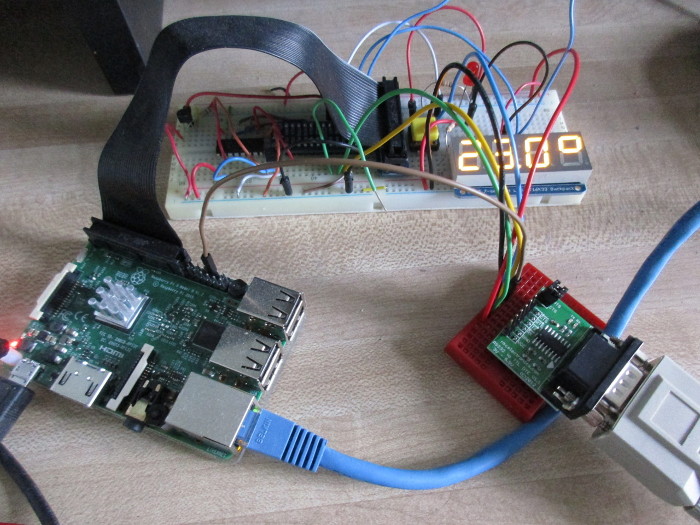
- Now that flow control is hooked up, you'll want to run things through
a proper serial level line driver. You can get these, the ones
using a 3232 style chip are common. Be sure to get one that
not only drives RX/TX but can do RTS/CTS as well.
The one I am using is the one described here:
rs232 to ttl converter
Be sure to follow any directions on setting up your converter,
including jumpering the pins properly.
I used a null-modem cable, and the following connections:
| Pi3 | rs232 converter |
|---|
| 3.3V | VCC |
| GND | GND |
| RX (pin10) GPIO15 | RX |
| TX (pin8) GPIO14 | TX |
| RTS (pin11) GPIO17 | RTS |
| CTS (pin36) CPIO16 | CTS |
- Now it's time to test if the HW flow control actually works.
Our test case is the rpi3 as the main system with a
terminal hooked up to it (in this case an x86 machine running minicom).
You need to get agetty running on the pi over ttyAMA0 using flow
control (that way you can login from the terminal). On sane Linux
systems this is as simple as modifying /etc/inittab.
If you're cursed with systemd then it is much more of a pain,
involving editing files in /etc/systemd/syste/getty.starget.wants/
I never figured out how to get that to work so I was running
agetty by hand with the -h 115200 ttyAMA0 options.
Now configure your terminal to do HW flow control. You can do
this in a menu from minicom.
Now send a lot of data across! Run cmtarix.
Or cat /boot/kernel.img | uudecode -m -.
This doesn't seem to be enough to toggle the RTS line, but
if you bring up a menu on minicom (^AO) it stops reading data
out of the port and this causes the pi3 side to
see CTS=1,RTS=0 and things stop. If you close out the menu
the pi sees CTS=0,RTS=0 and resumes transmitting.
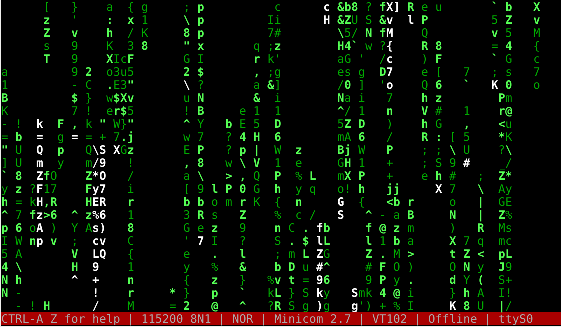 Nowhere near as pretty as JWZ's terminal.
Back to VMW Productions page